The real difference between an illuminated and a non-illuminated arcade button is power and wiring — not feel, and not durability. An illuminated button has an LED inside, so it needs a 5V or 12V feed (and a controller if it is RGB). A non-illuminated button is just the plunger and a microswitch: two terminals, no power, nothing to wire beyond the switch itself. The plunger, the mounting, the click, and the switch underneath can be identical on both.
That is worth stating plainly, because the lighting question often gets tangled up with quality. A lit button is not more “premium” in any mechanical sense — the microswitch doing the actual work is the same part. What lighting buys you is visibility and presentation; what it costs you is a little more wiring and a power budget to plan.
What is the same on both
Both styles share the parts that decide how a button performs. The microswitch sets the click and the actuation force. The mounting — 24mm or 30mm, snap-in or screw — decides whether it drops into your panel. The plunger shape and travel decide the feel in the hand. If you have standardized on a layout, you can usually mix lit and unlit buttons in the same panel without redrilling anything.
What lighting actually adds
An LED, a power feed, and wires. For a single-color button that is a 5V or 12V line and a common return. For RGB it is more involved: each button carries an addressable or analog LED that a small controller drives, which is how cabinets do color cycling, per-button mapping, and attract-mode animations. None of this touches the switch path, so a lit button registers a press exactly like its unlit twin — it just also glows.
When to choose illuminated
Lighting earns its place when the panel is part of the show. Rhythm and music games lean on per-button color to tell the player where to hit. Claw machines, ticket redemption, and premium cabinets use it for attract mode and brand color. There is a plain practical side, too: lit buttons give players clear feedback in a dark arcade, and they make a control panel read as finished rather than utilitarian. If your cabinet is competing for attention on a busy floor, light it.
When non-illuminated is the smarter call
Plenty of builds are better off without LEDs. Budget cabinets and simple control panels do not need the extra harness. Repairs and replacements are quicker when there is no lighting to rematch. And anywhere wiring time is the real cost — a large batch of machines, a fast refurb — skipping illumination saves labor on every single unit. Some tournament builders prefer unlit panels for the same reason: keep the wiring dead simple and leave nothing to distract.
The wiring details that trip people up
Two things cause most of the trouble. First, voltage: pick 5V or 12V for the whole panel and stay there. Mixing voltages across buttons is the classic way to end up with mismatched brightness or a dead LED. Second, current and common lines: know whether your buttons are common-anode or common-cathode, and budget the current per LED before you daisy-chain a full panel off one feed. For RGB, confirm the controller handles the number of buttons you are lighting. None of this is difficult, but it is far easier to plan than to rewire.
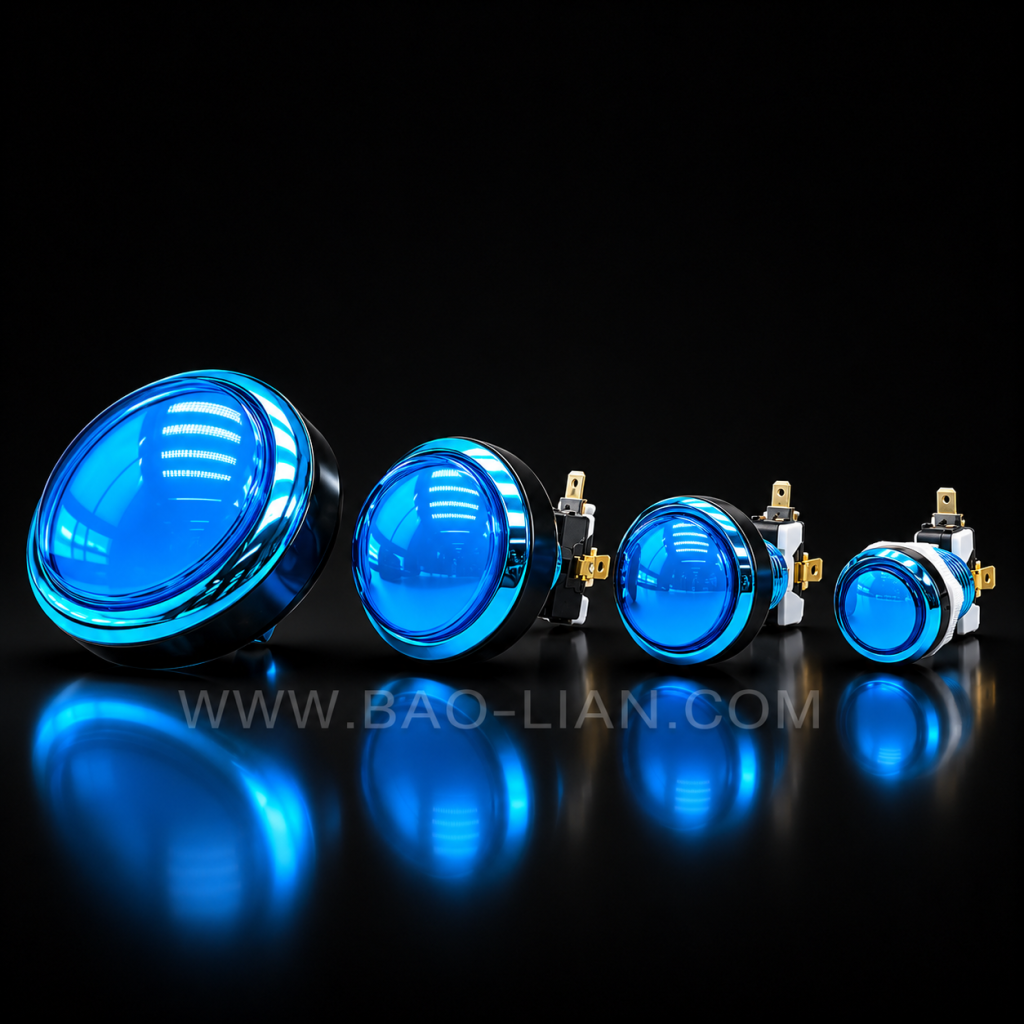
A quick word on sizes and mounts
Most panels are drilled for 30mm action buttons, with 24mm buttons for start and function — the sizing the majority of arcade panels and aftermarket parts follow. Snap-in buttons seat fast and pull out for service; screw-in buttons hold tighter in thicker panels and stand up to rough handling. Either style works lit or unlit.
Baolian arcade buttons
We make both, in matching families so you can mix them cleanly: illuminated LED and RGB buttons in 12V and 5V, and standard non-illuminated buttons, in 24mm, 30mm and full-size formats with snap-in or screw mounts and plated or standard finishes. Tell us the panel size, the voltage, and whether you want lighting, and we will quote to your build — samples first, then bulk. Start on the contact page.
Comments
No comments yet.